
Arduino Yun Workshop
The two day workshop by Ankit Daftery was a great way to dig deep into the possibilities of the Yun. As an interactive artist, I'm already aware of various options available. Trying them out was empowering and surprising. You can make complex interactions with just two to three days of effort [as a beginner], especially at an affordable price.

The two day workshop by Ankit Daftery was a great way to dig deep into the possibilities of the Yun. As an interactive artist, I'm already aware of various options available. Trying them out was empowering and surprising. You can make complex interactions with just two to three days of effort [as a beginner], especially at an affordable price.
This example converts two fruits into a drum kit, sort of a very basic version of the famous Makey Makey. Below is a short video of the test.

UX Workshop at Construkt
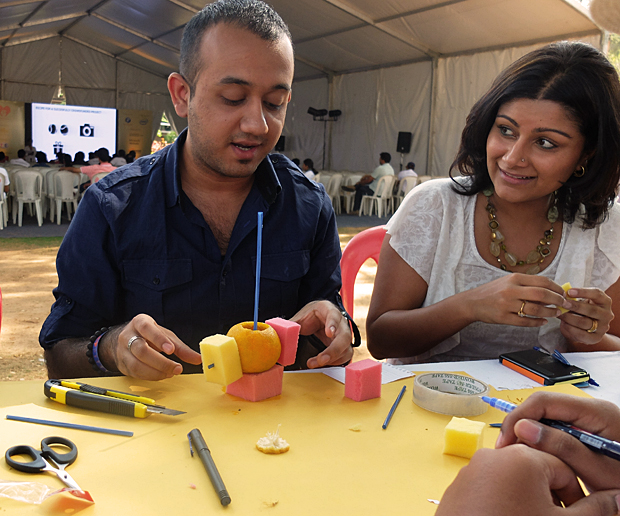
The workshop focussed on teaching hands-on design prototyping, taking the participants step-by-step through a prototyping process, how to think and analyse their design concept, and even a quick ten minute guerrilla user research at the festival grounds.

The workshop focussed on teaching hands-on design prototyping, taking the participants step-by-step through a prototyping process, how to think and analyse their design concept, and even a quick ten minute guerrilla user research activity at the festival grounds. It was rewarding to see the 25 participants get so involved and excited about what they were building. Below are some pictures of the three hour session. It started with some warm-up creative thinking activities, after which the participants chose a random 'everyday-life' object. They then proceeded to redesign it, much to their surprise! One of the participants chose an orange as a common 'everyday' object for the first exercise and ended up 'redesigning' it into a scent dispenser and pen holder. Every participant had a set of raw materials such as card paper, straws, tape and foam pieces to use. UX Workshop participants at the Construkt Festival, Bangalore. The Construkt team gave me a beautiful location under a giant tree on the festival grounds, so everyone could work in the outdoors.

UX participant shows off his prototype, a redesigned Table Tennis racket as part of a completely new type of Table Tennis.
UX workshop participants at the Construkt festival, Bangalore. One of the central goals of my workshop was to make it hands-on learning, and also ensuring it was fun. It is so important to enjoy these exercises since it makes people more relaxed and therefore more creative.
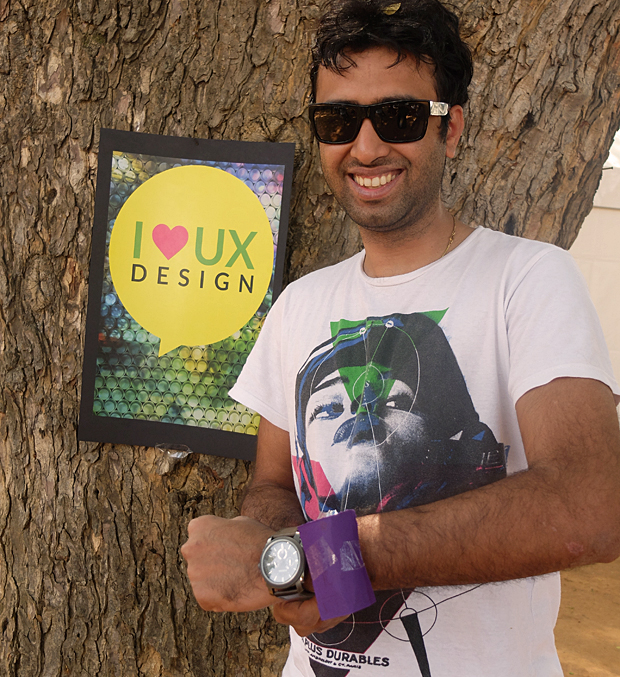
UX participant shows off his smart watch prototype at the end of the workshop. The last stage included quick user research, getting reactions from people wandering around the festival and trying to make last minute adjustments on the first level prototype.

Creative Workshop at Sourcebits
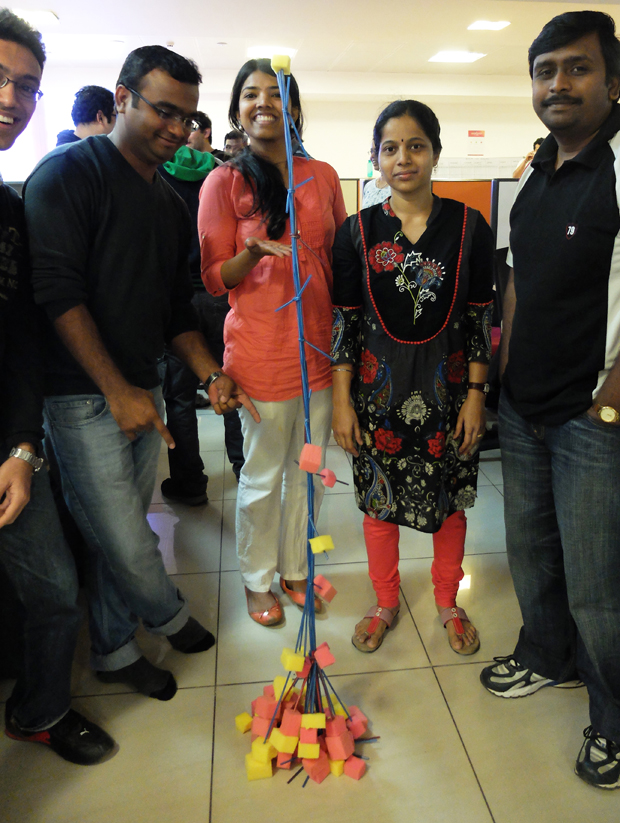
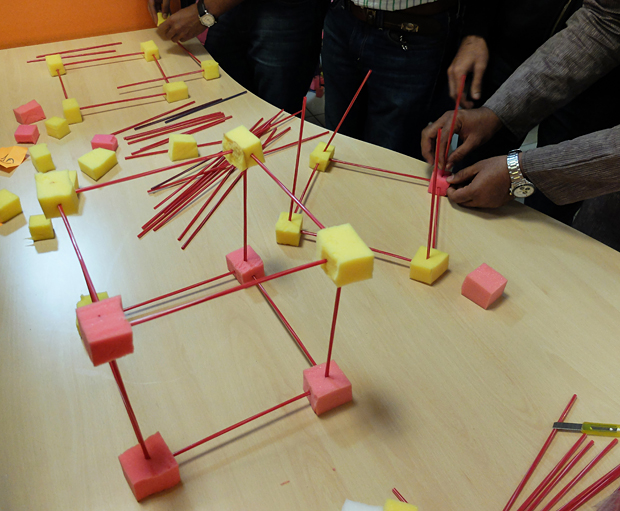
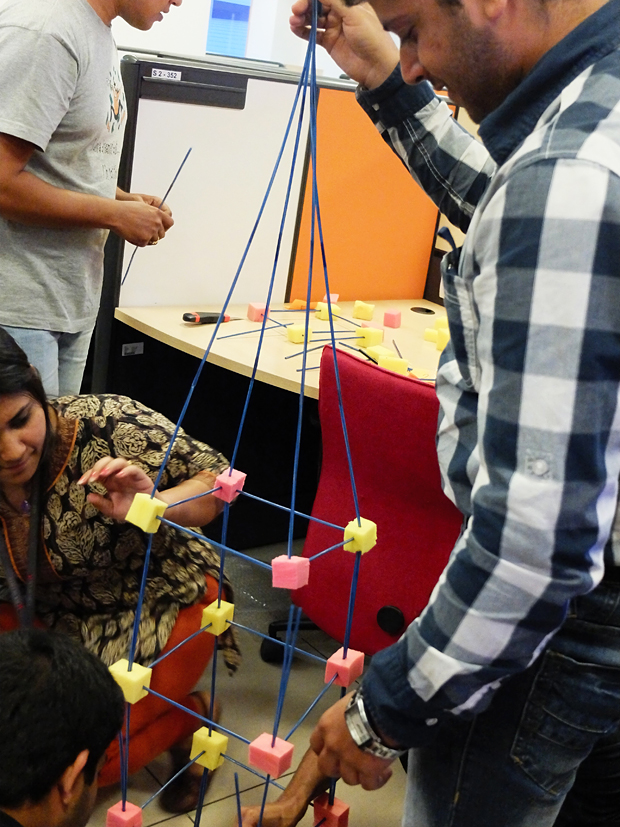
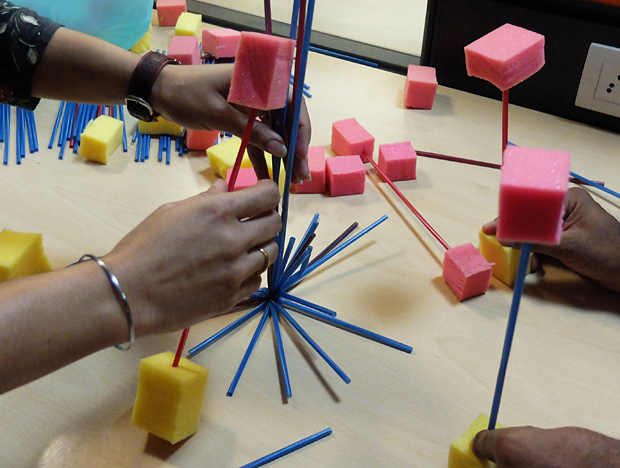
nspired by the Marshmallow Challenge Ben and I organized a creative thinking workshop for the lively crowd at Sourcefest, a two-day hackathon for the employees of Sourcebits. The aim of the session was to get people excited and energetic, and of course get their creative juices flowing. Instead of using marshmallows and spaghetti, I sourced waste foam material and straws. The idea of wasting so much food just didn't make sense [especially in India]. 45 people attended the session.
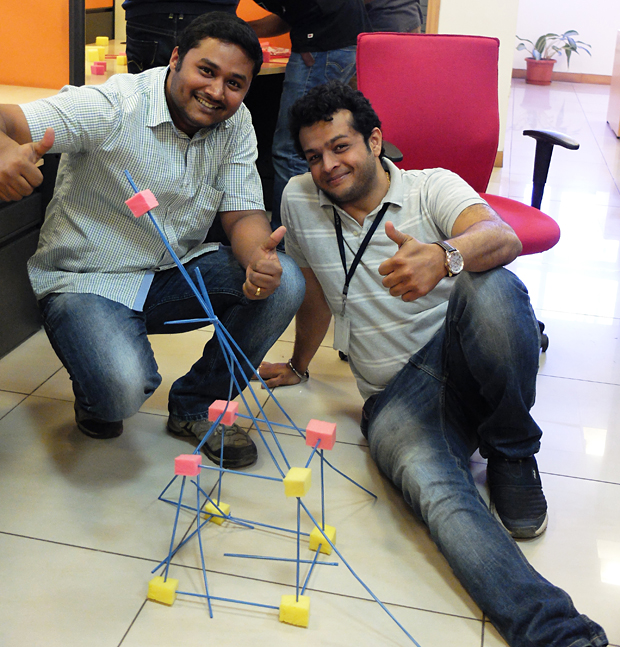
Inspired by the Marshmallow Challenge Ben and I organized a creative thinking workshop for the lively crowd at Sourcefest, a two-day hackathon for the employees of Sourcebits. The aim of the session was to get people excited and energetic, and of course get their creative juices flowing. Instead of using marshmallows and spaghetti, I sourced waste foam material and straws. The idea of wasting so much food just didn't make sense [especially in India]. 45 people attended the session. Rules were pretty simple, use only straws and foam cubes, no glue/sticky tape is allowed, and the tallest structure wins. And the tricky part - the tallest point of the standing structure has to be a piece of foam.
Very rewarding to see everyone have so much fun and make crazy structures. Here are some pictures from one hour session.


Neon Workshop

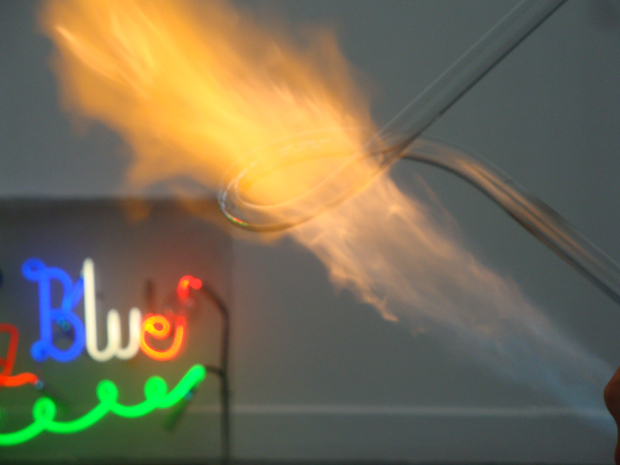
The neon workshop was a one-day crash course on making neon lights. Detailed demonstrations on how to bend glass tubes, suck out all the air and then fill the tube with either neon, argon or helium took up the first half of the day. The second half was spent exploring the material, after which we were given free reign on the propane blowtorches!! :)
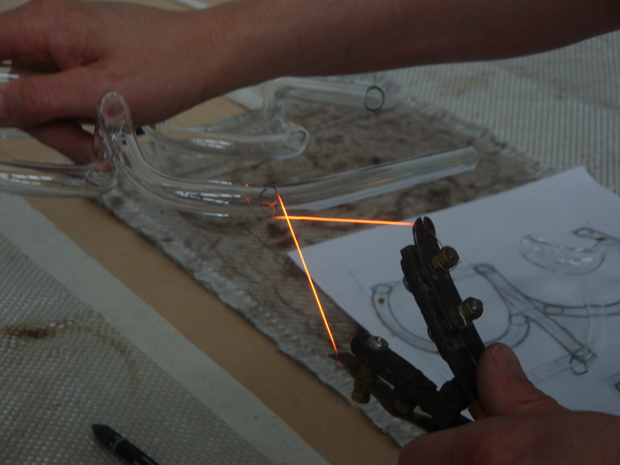
Cutting a glass tube
Glass tubes are bent after careful heating in the right angles, using gravity. Results like this only come after lots of practice.
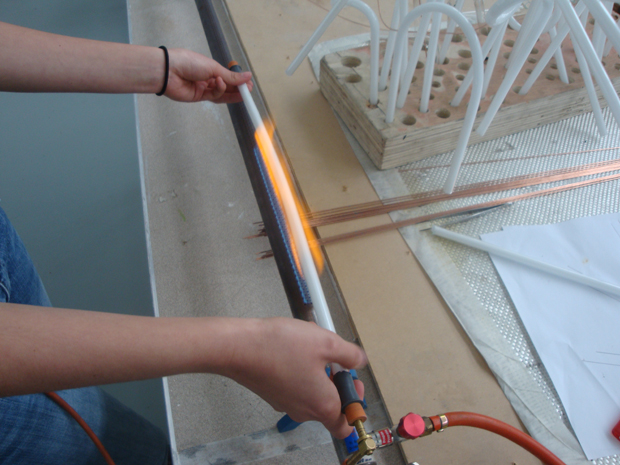
The ribbon burner has a long flame that softens a large part of the tube evenly.
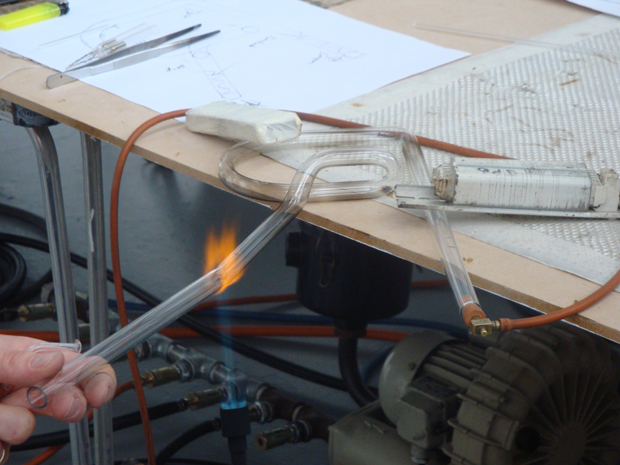
Joining two glass tubes using a precise burner was extremely difficult. I totally failed at my attempt, I ended up blowing a glass bubble instead because of too much air, and then the bubble burst. A tube with a hole can never be used for neon.

Part of the giant machine that creates a vaccum in the tubes before filling it with the required gases.
Neon master Julia Bickerstaff and British artist Richard Wheater encouraged us to question the limits of the material and explore its potential in relation to our individual art practice. That was the best part, being introduced to a completely new medium and told to freak out with it on the same day. Also worth mentioning was how to transcribe an idea into a drawing for neon-making.
The video below is my work (made by Julia of course) which we filled with helium. I love the colour of helium, its a natural pink hue that went well with the concept, which is the number sixty-nine in Devanagari letterforms. Due to a few impurities added in the tube flickers continuously, an effect that I really really wanted to try out. Another way to do this would be to programme it to flicker. However this is purely physical and does not need any external controls.
The best work was displayed later at the Light Night festival in Bournemouth town center and the Neon: Shaping Light exhibition at the text+work gallery.
Bombay Book Cover
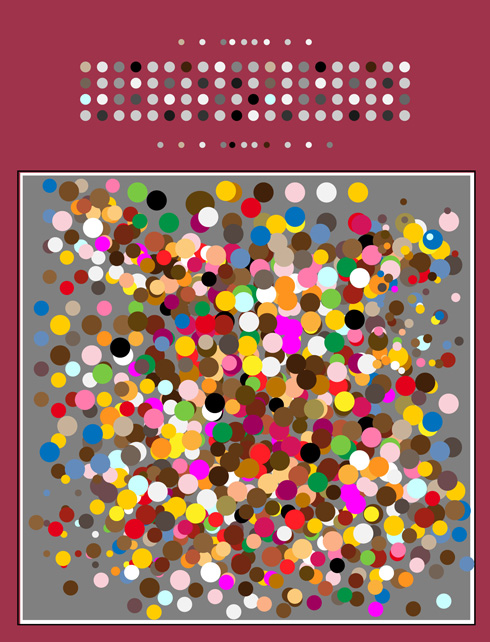
I attended a group tutorial that was held for all the Graphic Design MA students on the 13th of Dec. I felt it was important to gain some perspective on my project, since graphic students would have a different point of view when it came to Interactive Media. Peer feedback is always helpful, and I was simply curious about the kind of projects the other MA students were working on. The one-day workshop was moderated by Phil Jones, and involved all of us creating a quick piece of graphic work based on an open-ended brief. We were instructed to find an object or a photograph that had anything to do with our chosen topic, in my case, Mumbai. Since we had just 30 minutes, I ended up with a Time and Life book on Bombay, and chose the cover as my topic of study.


What followed was a group analysis, dissecting the object in terms of semiotics, its source, context, its materials and other relevant factors that give it meaning. After the analysis each person was given a new brief: to convert or transform the object into a graphic work keeping in mind theanalysis and discussion. Each person was given two hours to create a finished piece of graphic work.

During the discussion several people mentioned "dots" as a recurring shape in the cover, as each person was reduced to a dot. Another point was how the photograph transformed many individuals into one large mass of colour. My aim was to reduce the cover to its basic colours and shapes. In one way the poster is a mockery of the original object, as it strips it of meaning. At the same time is still comparable to the original when placed next to the other because of similar shapes, alignment and colours.